A lot goes into creating beautiful, functional user interfaces—from the initial ideation and conceptualisation to prototyping and user testing. As a UI designer, it’s crucial to understand how to navigate the entire UI design process. But where do you begin?
In this guide, we’ll walk through each step of the UI design process, including tips, tools, and best practices to get you started with UI design. We’ll cover:
- What is the UI design process? 7 steps
- What tools do UI designers use?
- How to create an effective UI design process that works for you
- Tips and best practices for better UI design
Let’s dive straight in!
What is the UI design process? 7 steps
Just as Rome wasn’t built in a day, designing beautiful, functional user interfaces is a (sometimes lengthy) process. Let’s take a closer look at what you can expect at each stage.
Step 1: User research
You might want to start getting creative from the get-go, but the first step in the UI design process is wrapping your head around the project. Who is it for? What’s the end goal? Answering these questions will help you build a solid foundation for the project.
To get there, jumping into user research is critical. Surveys, competitor analysis, focus groups, and user interviews will help you understand your users’ expectations and pain points, so you can design user interfaces that are both beautiful and relevant. During this stage, you’ll work closely with the UX designer to establish user personas that keep everyone on track.
Read next: How do UX and UI designers work together?
Step 2: Define objectives
Based on the insights that came out of the user research, it’s time to translate them into clear design objectives and goals that will shape the foundation of your design strategy.
This involves identifying the key features, functionalities, and user tasks that the interface should support, keeping the target audience in mind as you start to think about what elements and content will be included in the digital product.
Establishing measurable goals will help guide your design decisions, as well as provide a reference point for how successful your design is upon launch.
Step 3: Wireframing
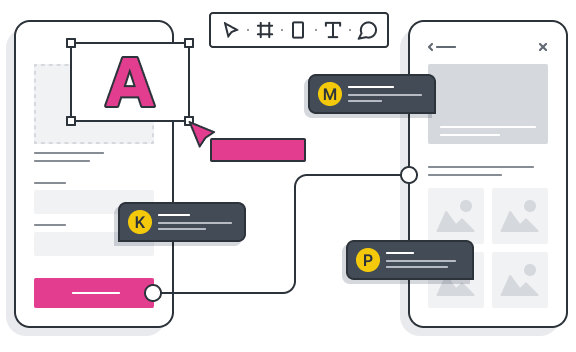
It’s time to start creating—and wireframing is an indispensable step. Wireframing involves generating low-fidelity outlines of the layout and structure of the interface. They serve as a blueprint for the design, helping you get clear on the placement of elements, information hierarchy, and overall flow before diving into the visual design.
Wireframes also help you validate your design with all key stakeholders, allowing everyone to have their say about what goes where before anything gets finalised. Wireframing is highly collaborative—you might find yourself tearing the design down and starting from scratch, but this is the stage to do it.
Step 4: Visual design
Once the wireframes are in place, it’s time to move on to the exciting visual design phase! Prior to this point, you might have created a mood board complete with colours, typography and animations reflecting the users’ needs and design goals.
Now’s the time to develop a clear visual strategy, which involves deciding on an appropriate colour scheme, choosing fonts and typefaces, and designing a library of visual elements that align with the company’s branding. With the visual strategy agreed upon, you can start developing your wireframes from low-fidelity sketches to mid-fidelity designs, adding branding and personality to bring them to life.
This is a highly iterative stage that’ll see you continuously share your designs with stakeholders and refine them as you go. After a few rounds of feedback, you should end up with beautiful, static mockups that closely resemble the finished product.
Step 5: Prototyping
Once you’ve designed a user interface, it’s time to take your designs from static files to interactive prototypes. Not only does prototyping showcase your design’s functionality and flow to stakeholders, but it also lets you see (and test) your designs in action. There are several great prototyping tools to choose from, ranging from simple click-through mockups to advanced interactive simulations, which allow you to navigate the digital product in users’ shoes and refine the design ahead of the product development stage.
Step 6: Testing and iteration
User testing plays a crucial role in the UI design process. Your design might look tip-top from where you’re standing—but it’s important to remember you’re not the end user! Testing your prototypes with real users will help you identify any usability issues or pain-points you might have missed along the way. It also helps you get a sense of how your visual design strategy is resonating with real users—and how it meets (or exceeds) their expectations. You might need to go through multiple rounds of user feedback and improvements to get to a design that both you and your users love.
We explore the importance of UX testing in this comprehensive guide.
Step 7: Development handoff
Once the design is finalised, it’s handoff time. This stage will see you prepare detailed design specifications and assets for the developers so they can ensure the final product closely matches your design vision. Depending on the complexity of your design, you’ll also need to provide interaction guidelines that explain how interactions like hover effects, transitions, or animations should behave.
Some UI designers create style guides, which serve as comprehensive documentation of the visual and interaction design guidelines, branding elements, and UI components used in the design. Style guides help establish and maintain a consistent visual language across the digital product.
What tools do UI designers use?
UI designers rely on a variety of tools to bring their creative vision to life. Let’s take a closer look at some of the most popular UI design tools available.
Wireframing tools
- Balsamiq: This user-friendly tool offers a range of pre-built UI components and a hand-drawn style to help designers quickly create low-fidelity wireframes.
- Sketch: Although primarily known for visual design, Sketch also offers extensive wireframing capabilities, providing an intuitive interface, reusable symbols, and a wide range of plugins to enhance wireframing workflows.
- Adobe XD: Boasting an intuitive interface, Adobe XD offers robust wireframing features, including collaboration functionality for easy teamwork.
Read next: The best UX wireframing tools of 2023
Prototyping tools
- Figma, a best-in-class design tool with comprehensive prototyping capabilities, including transitions, animations, and real-time collaboration features.
- InVision, a widely-used prototyping tool that provides an end-to-end design and collaboration platform, with features like interactive hotspots, animations, and easy feedback-gathering capabilities.
- Axure RP, an interactive design tool for complex prototyping through advanced features like conditional logic, dynamic content, and variable-driven interactions.
Visual design tools
- Gravit Designer, a web-based vector design tool for UI design. Gravit has an intuitive interface, robust vector editing tools, multi-page/artboard support, and reusable components to help you keep your designs consistent. It’s also completely free!
- Framer, a design and prototyping tool geared towards creating beautiful, pixel-perfect prototypes. It combines visual design tools with a powerful code editor, allowing designers to create custom animations, interactions, and responsive designs.
- Figma: We know we already mentioned Figma—but besides its prototyping capabilities, Figma is one of the world’s most popular visual design tools. It provides a robust set of vector editing tools, shared styles, and design libraries for collaborative visual design work.
Collaboration and design handoff tools
- Zeplin streamlines the design handoff process by automatically generating style guides, providing design specs, and allowing developers to inspect and export design assets directly from the tool.
- Avocode simplifies the design-to-code handoff process by offering features like design version control, design inspection, and generating production-ready code snippets for developers.
- Abstract is a version control and collaboration platform specifically designed for designers, allowing them to manage design files and provide design reviews.
User testing tools
- UserTesting allows designers to conduct remote usability tests by providing access to a large panel of users who’ll provide design feedback.
- Maze is a user testing platform that enables designers to create and run usability tests, and easily synthesise feedback.
Check out our full list of the best user interface (UI) design tools.
How to create an effective UI design process that works for you
No two UI design processes look the same—and as a UI designer, it’s important to tailor the UI design process to your specific needs so you can create a better final design. Let’s explore some of the ways you can make the UI design process work for you.
Define your workflow
Consider the specific stages and activities involved in your design project, and create a roadmap that outlines each of these steps—and how they interconnect. By establishing a clear workflow, you can better manage your time, prioritise tasks, and ensure a smooth progression from one stage to another.
Choose the right tools
While the saying “a worker is only as good as their tools” is a little controversial, the tools you choose can have a huge impact on how effective your UI design process is. It’s all about finding the right tools for your project and design style, with the features and functionalities that make your life easier. Don’t forget to explore integrations and collaboration features that help you work better with UX designers, developers, and other stakeholders.
Collaborate the right way
Speaking of collaboration, it really is the secret sauce of successful UI design processes. Aim to foster open lines of communication, and establish regular checkpoints to align on project goals. Involve UX designers in the early stages to ensure the UI design is user-focused. Work closely with developers to understand technical constraints to help you create realistic designs.
Ask for feedback
Working iteratively helps you stay on track and avoid wasted time or resources. To work iteratively, you need feedback from users, clients, team members, and other stakeholders at different stages of the UI design process. Embrace a culture of continuous improvement and use feedback to refine your designs, so the final product meets the needs and expectations of both the users and the business.
Document and share design guidelines
Documenting UI design principles, visual styles, colour palettes, typography guidelines, and interaction patterns is crucial for consistency and efficient collaboration. Share these guidelines with stakeholders to provide a clear reference for design decisions and foster a shared understanding. This keeps everyone on the same page, and helps you feel more in control of the UI design process overall.
Tips and best practices for better UI design
Maybe you’re new to the UI game, or a seasoned designer looking to keep your skill set updated. There’s always room for improvement. Here are five tips and best practices to make your UI designs even better.
Maintain consistency
While it might seem like an obvious (or even boring) checkbox exercise, consistency plays a crucial role in UI design. Consistency helps users develop mental models and reduce cognitive load, resulting in a more enjoyable user experience. Creating a cohesive visual language by using consistent colours, typography, and UI elements throughout the interface will also help establish brand recognition and add credibility to your digital product by making it look more professional.
Design for accessibility
Accessibility is a fundamental aspect of UI design and should never be an afterthought. Before you get carried away with the creative side of UI design, you need to first make sure that the interface is easy to navigate for users with varying abilities. Be sure to use colour combinations that meet contrast accessibility guidelines, provide alternative text for images, and design with keyboard navigation in mind.
Include microinteractions
Microinteractions are subtle, purposeful animations or visual responses that happen in response to user actions. They provide feedback, communicate system status, and enhance the overall user experience by bringing the interface to life. Incorporating meaningful microinteractions, like button hover effects or progress indicators, will no doubt take your designs to the next level. Learn more about the importance of microinteractions (and how to create your own) in this guide.
Don’t forget the details
Small details can have a big impact on the overall user experience—and adding unexpected design elements or animations that surprise and delight users. These could be anything from subtle transitions to playful loading animations. Paying attention to the details can create small moments of joy, leaving a lasting impression on users and helping your design stand out.
Stay inspired
UI design is an ever-evolving field, and staying updated with the latest design trends, emerging technologies, and best practices is vital to keeping your designs competitive. Start by joining design communities or following design influencers on social media. Constantly learning about emerging UI design techniques will help you push the boundaries of your designs and create innovative user experiences.
Read next: 15 UX influencers you should be following in 2023
Final thoughts
The UI design process can be long—but incredibly rewarding. Over these seven steps, you’ll take your ideas from conceptual conversations to functional, responsive websites that delight and engage users.
It’s also important to note that each project will require different strategies and approaches, so take your time researching to find the right tools that work for you. The more user interfaces you design, the more confident you’ll feel in your process!
Check out these related blog posts to learn more about the possibilities within UI design:
- User interface guidelines: 10 essential rules to follow
- How to take your UI from good to great: 5 simple hacks for creating beautiful user interfaces
- 8 UI design dos and don’ts (with examples)


