

So you’re ready to build your UX design portfolio.
You’ve read all about what a UX portfolio is and why it’s important. You’ve learnt the UX process and applied it to some real-world projects. Now it’s time to showcase your design credentials in the form of your own portfolio website.
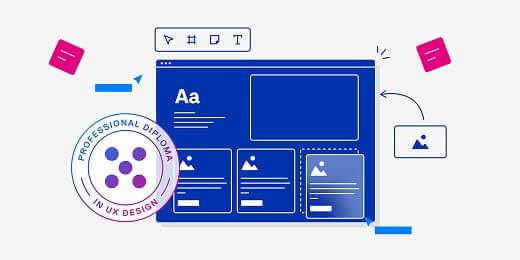
Follow this guide to create a professional UX portfolio from scratch.
Step 1. Register a domain name
On the technical side, there are two things you need to build your portfolio website: a domain name and web hosting. You can buy these separately from different providers and then connect them, or go with the same service for both. In this guide, we’ll do them separately.
So, the first step is to find and buy your own domain name.
This determines your portfolio URL, and should be something short, simple, and memorable. Many UX designers use their name—for example, UX designer Niya Watkins’ portfolio domain is simply “www.niyawatkins.com”.
Your domain name is part of your brand. It adds to the professionalism of your portfolio and, by extension, your credibility as a designer. Keep that in mind when choosing your domain.
Here’s how to find and register a domain name for your UX portfolio:
- Search sites like GoDaddy, Squarespace and IONOS for your desired domain name.
- If your domain name is available, you’ll see how much it costs to buy it. If it’s unavailable, the domain checker tool will suggest alternatives.

- Once you’ve settled on a domain name, go through the purchase process. You might have to choose whether to add your domain name to an existing site, or just to buy the domain name. At this stage, opt to just buy the domain.

Step 2. Sign up for a web hosting service and connect your domain name
Next, you need to find a web hosting service. This is where your website will “live”. Opt for a web hosting service that doubles up as a website builder, complete with ready-made templates.
Some of the most popular all-in-one web hosting services and portfolio builders include:
The exact sign-up process depends on your chosen hosting service, but you’ll typically complete the following steps:
- Choose your host
- Sign up with your email address. This step is usually free, but you’ll have to pay later when you connect your domain
- Connect your domain name
Let’s say you’ve bought your domain name through GoDaddy and want to use Wix to host and build your UX portfolio.
First, you’ll sign up for a free Wix account using your email address.
You’ll then go through the “getting started” process—specifying what type of website you’re creating (a UX portfolio) and giving your website a name. This name is not your domain name—it’s just a label for your website within your chosen builder.

You’ll then connect the domain name you bought in step 1. This ensures that the website you build is associated with your chosen domain name (and therefore findable via the associated URL).
In Wix, you’ll find this option under “Settings”:

If you’ve already bought your domain name (as in step 1), you can select the option to connect a domain you already own. If you don’t yet own a domain, you can select the option to get a new domain name now.

At this stage, you’ll need to pick a payment plan for your web hosting service. You can choose to pay monthly or yearly. Paying for the year upfront often works out cheaper, so it’s worth doing if you can.
Step 3. Choose a template for your UX portfolio
That’s the technical part done! Now you can bring your UX portfolio to life.
The next step is to choose a template. Templates form the basis of your website’s design. You can follow the structure and colour scheme laid out by your chosen template, or you can customise it as you go along—it’s entirely up to you.
When choosing and customising a template, think about your brand. Do you want something modern and sleek or bright and playful? Should your design be artsy, corporate, or something in between?
A template is just the foundation. You’ll replace the demo content with your own, turning your UX portfolio into something entirely unique.

Having trouble choosing a template? Browse existing UX portfolios for inspiration. And remember, you can always change your template later if you’re not happy with the finished product.
Step 4. Create the blueprint for your portfolio
With your template in place, you’re now going to map out the architecture of your portfolio website.
These are the main sections you should include in your UX portfolio:
- A home page
- An “About Me” page
- A portfolio page to house your UX case studies
- Contact details
You may also want to include a blog, but that’s entirely optional.
At this stage, you’re simply creating placeholders for each of these pages. Again, the exact process depends on the website builder you’re using, but it’s generally a case of adding pages to your site menu.

In Wix, for example, you can add, rename, and customise pages via the “Menus & Pages” tool in the “Editor” view.
Add new pages (or rename existing pages) so that your site menu consists of a home page, an “About” page, a portfolio, a contact page and, optionally, a blog.
Next, you’re going to add content to each section.
Step 5. Customise the home page
The home page is usually the first thing people see when they visit your UX portfolio. It contains 2 key things:
- A powerful personal statement
- A showcase of your most impressive UX case studies
How to write a personal statement for your UX portfolio home page
Your personal statement features at the top of your home page. You can think of it as your virtual elevator pitch; it’s a concise yet powerful introduction which clearly states who you are, what you do, and something that makes you unique. It should be no longer than 2-3 sentences.
See how Washington-based designer Niya Watkins does it?

Niya’s personal summary reads: “Niya Watkins is a UX designer based in Washington, DC. She uses human-centered design to create digital products and services that are intuitive and accessible. She is currently working to enhance the Explorer experience at National Geographic.”
In under a minute, we learn what Niya does and what she’s passionate about. She uses carefully-chosen words like “human-centred”, “intuitive” and “accessible”. Sounds like a designer who cares a lot about people!
When writing your own personal summary, you can experiment with typing directly in the website builder template, or you can draft different versions in a Google Doc (or with pen and paper) first.

You may also want to upload an image of yourself, but it’s not strictly necessary. You’ll notice that many UX designers don’t.
How to add UX case studies to your portfolio home page
Next, select some of your best work to showcase on the home page. This is like the trailer for your portfolio page (which we’ll build out in step 7).
The goal here is to provide direct access to your design work, allowing the user to jump straight from the home page to individual case studies, without going via your separate portfolio page.
How you design this showcase is up to you. If you’re not sure where to start:
- Add a section heading with the title “My work” or “Featured projects” (or something similar).
- Feature 3 UX case studies, adding an image, summary text, and a link to each. The link should go to the dedicated page for each respective case study (more on that in step 7).
If you’ve chosen a portfolio-specific template for your website, this project showcase element may already be built into your home page. If so, customise the existing images and text.
If not, use the website builder tool to add sections, text blocks, and images.
As always, look to other designers for inspiration. Niya Watkins features her work very simply as text on her portfolio home page:

Pendar Yousefi, Head of UX for Google Translate & Languages, uses graphics and hover effects for his home page showcase:

Product designer Olivia Truong also displays her case studies visually:

Experiment until you find the approach that works for you. And remember, you can always make edits later on.
Step 6. Write your “About Me” section
On the home page, you provided a snapshot of who you are. Now you’ll expand on that in your dedicated “About Me” section or page.
You can talk about:
- Your personal history (e.g. where you’re from, where you grew up)
- Your professional background (e.g. where you worked or what you studied before you moved into design, any interesting or impactful initiatives you’ve been a part of)
- What you’re passionate about and what motivates you as a designer
- Anything that has shaped your approach to UX
This can be one of the trickiest parts of building your UX portfolio, so be prepared to write a few drafts. Aim for 3-4 short paragraphs that tell a meaningful narrative. What do you want an employer or client to learn about you? What should they take away from your “About” section?
See Niya Watkins’ UX portfolio for inspiration:

Again, you can either type directly in your website template or draft your copy elsewhere first.
Following your “About” summary, you might want to list your relevant skills and experience chronologically—similar to your CV. It’s a good idea to add your email address at the bottom of the page, too.
Your chosen template should offer a ready-made structure for your “About Me” page, like this template from Wix:

You can either fill in the existing template, or use the editor tool to add your own sections, images, and text boxes.
Step 7. Build out your UX case studies
Now for the most important part: your actual UX portfolio.
Each UX case study can live on a sub page which is nestled beneath the main portfolio page. In most website builder tools, it’s a case of creating a new page and then dragging and dropping it so it sits underneath the parent page.
Here’s how that looks in Wix:

Now you have a main portfolio page which will link out to individual case study pages. And remember: You’re also linking to these individual case studies from your home page. It’s all coming together!
Adding content to your portfolio “parent” page
Just like your home page, the main portfolio page will display a selection of your UX case studies. It’s the hub of your portfolio—a showcase the user can browse before zooming in on a single case study for more detail.
Use the website editor tool to add an image, title, and summary text for each of your UX case study “previews”. Most importantly, add a call-to-action text with a link to the full case study. For example, “View the full case study here” or “Learn more”.
Here’s how your main portfolio page might look, taking Product Designer Simon Pan’s portfolio for example:

Building out individual UX case studies
A UX case study outlines the process you followed when working on a design project.
When looking at your UX portfolio, hiring managers want to see evidence of 3 things:
- UX hard skills (such as research, wireframing and prototyping)
- Understanding and application of the UX design process
- Your approach to problem-solving within the design context
These are all demonstrated through your chosen UX case studies.
For an example of a UX case study in action, take a look at Danielle Gonzalez’s Chamos Language Academy case study.


Ready to build your own? Here’s what each UX case study should include:
- A meaningful title and brief description—for example, “British Airways App Redesign: Redesigning how travellers book and access flights via mobile”.
- A brief note stating your role in the project.
- A clear problem statement, setting out the challenge you were aiming to solve.
- A summary of your users. Who were you designing and problem-solving for?
- Insight into your thinking, methodology, and processes. How did you go about solving the design problem? What methods did you use? What steps did you take to reach your final solution?
- A clear outcome. Share what the finished product looks like and how it functions.
- An evaluation of the impact. What was the impact of your work? Do you have any qualitative or quantitative data to show how the new app you designed helped to increase customer retention or improve the user experience in some way? Ultimately, did you achieve what you set out to do?
A UX case study should tell the story of how you got from A (user problem) to Z (solution), and the impact of your work. Build out your case studies with text, visual assets, and data.
You can include photos or screenshots of your research and analysis (e.g. affinity maps, personas, and user journeys), early pencil sketches and low-fidelity wireframes, interactive prototypes, or even video walk-throughs—anything that helps to demonstrate how you work as a designer.
So what’s the best way to add UX case studies to your portfolio? We recommend the following:
- Lay out the framework for your case study in a Google Doc. What sections and steps will you include, and in what order?
- Gather all the artifacts you’ll need to illustrate your case study, such as images, screenshots, prototypes, and quotes.
- Draft the text for each section, still in your Google Doc.
- Take a break and come back to it. Does it still make sense? Is it logical? Make any necessary changes.
- Once you’re happy with it, add all the content to your portfolio website.
As you’ve been doing throughout, fill in your chosen website template or define your own structure by adding sections, images, and text boxes.
Repeat the process until you have at least 3 outstanding case studies in your portfolio.
Note: Remember to go back to your home page and place the correct links to your individual case study pages.
Step 8. Update your “Contact” page
Almost last, but certainly not least: Customising your “Contact” page. Here you can include a contact form, your email address, and links to your social profiles.
If you’re looking for something specific, feel free to include that, too. For example: “Open to freelance UX work in the FinTech space”.
Product Designer and Developer Daniel Autry includes this friendly note in his UX portfolio:

Step 9. Add content to your blog section (optional)
A blog is completely optional, and it may be something you add to your portfolio later on.
Most website builders offer a blogging function. It’s usually a case of adding a new page and selecting “Blog” as the page type. You’ll then have the usual customisation and editing options.
Here’s how that looks in Wix:

From there, the content is up to you. Not sure how to get started with a UX blog? Product and UX Designer Elaine Tran shares her own experience and tips in this article for UX Collective.
Step 10: Publish, check, and user test your portfolio
Are you happy with how everything looks in “Preview” mode? Then you’re ready to go live. Click “Publish” to launch your UX portfolio into the World Wide Web.
Once you’re live, open up a browsing tab in incognito mode and view your website as a visitor. Click around and make sure everything looks and functions as it should.
You can then pass it on to family, friends, or colleagues for some user testing. If possible, get feedback from a UX professional (especially on your case studies). Otherwise, ask your reviewers to keep an eye out for typos, spelling mistakes, broken links, or strange-looking layouts.
Implement any feedback and prepare to go public with your portfolio.
Step 11: Share your UX portfolio with the world
You’ve invested time, money, and effort into creating a professional UX portfolio. You’ve gathered and implemented some user feedback. Now it’s time to share it with the world.
Add a link to your portfolio website on all your social media profiles, in your email signature, and on your CV. If you want to actively draw attention to your portfolio (and why not?!), post about it on LinkedIn. It’s incredibly satisfying after all the work you’ve put in!
Creating a UX portfolio is a crucial step towards building a successful career in UX. With this guide, you have a clear roadmap to make it happen. For more inspiration, take a look at these impressive UX portfolio examples from around the web.
Want to show off your UX portfolio? Share it with us on social.

Emily is a professional writer and content strategist with an MSc in Psychology. She has 8+ years of experience in the tech industry, with a focus on UX and design thinking. A regular contributor to top design publications, she also authored a chapter in The UX Careers Handbook. Emily also holds a BA in French and German and is passionate about languages and continuous learning.

 23")
